Using plocate to Index and Search SMB and NFS Network Shares
2023.11.02 | Yuki Rea
Have you ever tried to search a network share with Windows Explorer or another file manager?
If you have, then you know it is uselessly slow when searching anything more than a small directory.
This is because the file manager needs to loop through each directory and file on the drive if there is no index.
You can tell Windows to index network shares, but search is still extremely slow and indexing eats system resources.
What should you do then if you need to search an entire network share that may be multiple terabytes in size?
plocate is a simple Linux tool which can be used to create a lightweight database specifically designed for returning fast search results.
So quickly in fact that you can often search shares containing many terabytes of data instantly.
plocate can even be used within Windows by utilizing WSL (Windows Subsystem for Linux).
Below is a screenshot depicting a webpage I made which utilizes plocate to search 100+TB network shares within seconds.
[1] Install Prerequisites
plocate is not included by default on most distributions but is usually available within the default software repositories.
cifs-utils is needed to mount CIFS/SMB (Windows) shares.
nfs-common is needed to mount NFS shares.
Use the following command to install the prerequisites on Debain based systems.
apt install plocate cifs-utils nfs-common
[2] Mount Network Shares
Before you can build an index of your network shares, you will need to mount them on the host device. This process is the same in a native Linux based OS and WSL.
Create a directory for for each network share you want to index. This will become the mountpoint. In this example, we will use /mnt/server/
mkdir /mnt/server/
Mount the share to the directory you just created. You will need to use the IP address of the server instead of the hostname. Use the username of a user who has access to the CIFS share. After pressing Enter, you will be asked to enter the password for the CIFS user.
Mounting an CIFS/SMB sharemount -t cifs //[IP_ADDRESS]/[SHARE_NAME] /mnt/server -o username=[username]
mount -t nfs [IP_ADDRESS]:/[SHARE_PATH] /mnt/server
[3] Configure updatedb.conf
You will need co configure updatedb.conf to ignore unwanted directories on the root of the system.
This is done using PRUNEPATHS
Open /etc/updatedb.conf using your text editor of choice and add all directories you would like to exclude to the list.
/etc/updatedb.conf
1 PRUNE_BIND_MOUNTS="yes"
2 # PRUNENAMES=".git .bzr .hg .svn"
3 PRUNEPATHS="/tmp /var /sys /root /spool /media /home /bin /boot /dev /etc /lib /lib64 /lost+found /opt /proc /run /sbin /srv /usr /vmlinuz /vmlinuz.old /initrd.img /initrd.img.old"
4 PRUNEFS=""
[4] Create The Database
The database which plocate uses is extremely basic, this is part of what makes it so fast to search.
Use the following command to create your database.
-v enables verbose mode to show which files are currently being added to the database.
-U specifies the root path to create the database from.
--output is used to specify where to output the database file.
updatedb -v -U /mnt/server/ --output='/var/lib/plocate/database.db'
[5] Searching The Database
Before you can start an index, you will need to mount your network shares on the host device. This process is the same in a native Linux based os and WSL.
-d can be used to specify the database file location.
-i can be used to search without case sensitivity.
tr '/' '\\' is used in this example to replace / with \ in paths for use in Windows clients.
6 plocate -d /var/lib/plocate/database.db -i [QUERY] | tr '/' '\\'
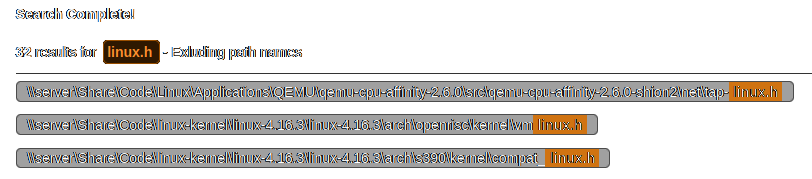
Results
plocate -d /var/lib/plocate/database.db -i linux.h
/mnt/server/Share/Code/Keyboard/QMK/qmk_firmware/lib/ugfx/src/gos/gos_linux.h
/mnt/server/Share/Code/Linux/Applications/QEMU/qemu-cpu-affinity-2.6.0/src/qemu-cpu-affinity-2.6.0-shion2/net/tap-linux.h
/mnt/server/Share/Code/linux-kernel/linux-4.16.18/linux-4.16.18/arch/openrisc/kernel/vmlinux.h
/mnt/server/Share/Code/linux-kernel/linux-4.16.18/linux-4.16.18/arch/s390/kernel/compat_linux.h
/mnt/server/Share/Code/linux-kernel/linux-4.16.18/linux-4.16.18/debian/hdrtmp/usr/src/linux-headers-4.16.18-rt12/include/acpi/platform/aclinux.h
/mnt/server/Share/Code/linux-kernel/linux-4.16.18/linux-4.16.18/debian/hdrtmp/usr/src/linux-headers-4.16.18-rt12/include/config/security/selinux.h
/mnt/server/Share/Code/linux-kernel/linux-4.16.18/linux-4.16.18/debian/hdrtmp/usr/src/linux-headers-4.16.18-rt12/include/config/usb/armlinux.h
...
Database Update Automation
You can automate updating the database using fstab to mount your network shares and cron to schedule jobs.
Mounting NFS Shares Automatically with /etc/fstab
Edit /etc/fstab as shown below.
/etc/fstab
# NFS SHARE
# file system                                  mount point     type      options                                                                                                                              dump  pass
[IP_ADDRESS]:/[SHARE_PATH] /mnt/server     nfs	defaults                                                                                                                                  0    0
Mounting SMB Shares Automatically with /etc/fstab
You will need to create a credentials file to store your SMB credentials. In this example, we will use /root/.smbcred
/root/.smbcred
user=smbuser
password=password
domain=domain
Edit /etc/fstab as shown below.
vers refers to the SMB version supported by the server. In this case "3.0"
/etc/fstab
# SMB SHARE
# file system                                  mount point     type      options                                                                                                                              dump  pass
//[IP_ADDRESS]/[SHARE_PATH] /mnt/server   cifs	uid=0,credentials=/root/.smbcred,iocharset=utf8,vers=3.0,noperm      0    0
Updating Database Automatically
In order to update the database automatically, we will use cron
Run crontab -e to open the crontab editor. In this example, the cron job will run everyday at 08:00.
crontab -e
# m h  dom mon dow   command
0 8 * * * /usr/bin/updatedb -v -U /mnt/server/ --output='/var/lib/plocate/database.db'