Custom Digital Gauge Cluster Using a $35 x86 Single Board Computer [Atomic Pi]
2020.04.26 | Yuki Rea
With modified turbocharged cars, it is a good idea to have some kind of indicators to inform the driver of boost pressure, air/fuel ratio, and engine knock events to ensure that the engine is operating within safe conditions. There are off the shelf solutions like individual gauge pods or OBD2 tuning devices like COBB Accessport but these do not have the functionality or flexibility that I wanted. They also generally cost much more. In the case of individual gauges they can be up to $300 USD per gauge from a decent manufacturer. The COBB Accessport itself is in the neighborhood of $600. The total cost of this project minus the Tactrix OpenPort 2 was around $150 USD, if you do not care about reflash functionality you can get a generic OBD2 cable for only a few dollars. This is an example of what it took to create a custom CarPC gauge display for my modified 2004 Subaru Impreza WRX.
Major Parts List
- Atomic Pi Single Board Computer
- Teensy 2.0
- Tactrix Openport 2.0
- DFRobot DFR0506 7" touchscreen LCD
- 12v to 5v 5A DC Power Supply
- 4-port USB HUB
In Car Computer
There are many solutions for in car computers, you could use a Raspberry Pi, a small form factor desktop, tablet PC, it all depends on your individual needs. In my case I needed to use an x86 based PC because the software I use to flash my car's ECU only works on x86 Windows Operating Systems. I use ECUEdit for monitoring and ECUFlash for tuning and flashing the ECU. I tried using a Winbook TW700 x86 tablet which worked well except for power and charging. This tablet, among others, charges via USB and will drain the battery while the tablet is in operation even when plugged into a USB charger. In my case the tablet would not draw more than 1A at 5V no matter what power source I used. This meant after a week or so of use the tablet's battery would die and I would need to take the tablet out of the car and charge it before it would turn on again. I settled on an Atomic Pi single board computer as my new in car computer because it is very affordable at $35 USD and has enough storage and memory to run Windows 10 plus my tuning software. To power the Atomic Pi I used a cheap 12v to 5v 5A DC power supply intended for adding USB charge ports to automobiles. I used the screw terminals at the back of the power supply to connect the Atomic Pi to DC 5V and 2 USB extensions to add charge ports for powering phones and other devices inside the car. The power supply is tapped off of the accessory power inside the car so that the system turns on and off with the ignition switch. The power supply is mounted in what used to be the in-dash cup holder above the speaker. I have replaced this cup holder with a phone mount and this power supply. The Atomic Pi lives inside the glove compartment for now until I mount it more securely in the passenger side foot-well underneath the dashboard. I 3D printed a case for the Atomic Pi in ABS plastic to help protect it from whatever it might encounter inside the car.
Visit Thingiverse via the link below to download the STL files for this case:
Low-Profile Atomic Pi Case


Custom Hotkey Controller
To make the in car computer easier and more ergonomic to use, I created a custom controller that presents itself as a USB keyboard to the computer. This controller then sends different macros in the form of USB HID commands to the computer when each button is either pressed or held. I started by designing switch housings to install into the factory accessory switch locations in the center console area. I used Cherry MX Blue switches with a 3D printed housing and keycap that fits nicely inside the housing. This creates a stealthy looking switch that you might not even realize is a button unless told. I then wired the switches up in a 3x1 matrix and terminated them with a 4x1 2.54mm pin pitch female connector which I used to connect the switch matrix to the Teensy 2.0. I designed a 3D printed case for the Teensy that pressure fits over it with a hole for the connector, when the connector is in place it locks the Teensy inside the case. This case was glued to the underside of the center console trim piece. From here the Teensy connects to the computer with a USB Mini B cable. I programmed the Teensy using the QMK keyboard firmware library. Each button is configured to have 2 functions depending on if the button was pressed or held. These 3 buttons can control all of the functions in ECUEdit that I use on a day to day basis.


Display
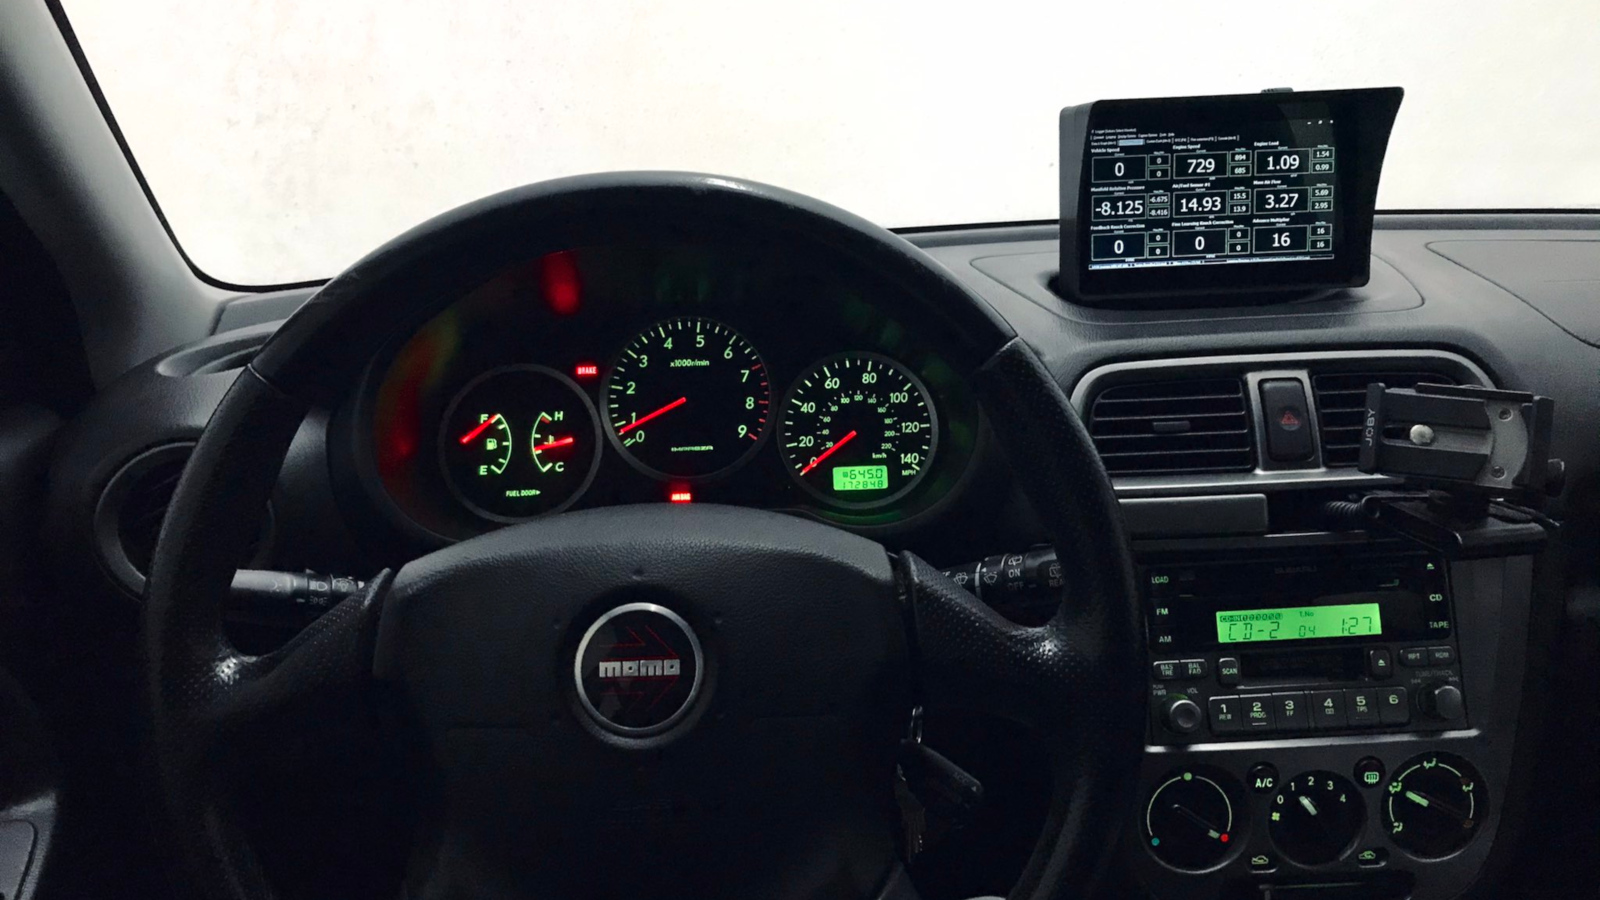
For the display I chose a DFRobot DFR0506 7" touchscreen LCD, I picked this particular display for a few reasons. First was the size, I wanted something large enough to display information in a readable size but not so big as to obstruct my view of the road. Second was I wanted a display with few cables which could be powered from USB. The last criteria was brightness control, I did not want an LCD blinding me during night driving because the brightness can not be adjusted. I designed a 3D printable case and bracket for the LCD that uses the original VFD clock mount on top of the dashboard as a mounting location. A hole in the center of the mount allows for the HDMI and USB cable to pass through the mount into the case of the LCD. The LCD case is assembled in 2 pieces. The screen fits into the front bezel which is sandwiched between the backplate and LCD frame. In the end this display ended up being a bit too dim to be usable in the daylight. It is still readable but is not as bright as I would like. I may try to overdrive the LED backlight to increase the brightness over the 200nit spec. If this does not work out I will search for another display.


Conclusion
This setup acomplished almost everything I wanted, however there are a few things that I would do differently now that I have finished building it. I would chose a brighter LCD screen that can be seen even in direct sunlight. I chose the screen I did for the sake of simplicity, I wanted to run as few cables as necessary so I limited myself to displays powered via USB. A higher power display which can be powered from 12v would probably be a better choice. As far as the Atomic Pi is concerened, I originally wanted to use the onboard speaker amp to output to my head-unit to play warning sounds for thresholds I set in ECUEdit. I was unaware that there were no drivers for this onboard audio device available for Windows based operating systems. It worked well in Linux but I needed to use Windows. I could have used a USB sound card or an HDMI audio stripper but at this point I have called the setup good enough for now. This is something I may add in the future if I decide to change the display to a brighter one.