Producing High Quality Photos for Your Website or Online Store
2021.01.30 | Yuki ReaTaking good product photos for your website or online store can actually be very easy. This is the process I use to take high quality photos for use on my website and eBay. Having professional looking, detailed photos for your listing will help attract buyers and give them confidence in the item or service you are providing. Having a high end camera is also not necessary, you can still get good results with even a phone camera. The ThinkPad keyboard and HP laptop photos shown below were taken years ago with an iPhone 4S camera.


Finding your space
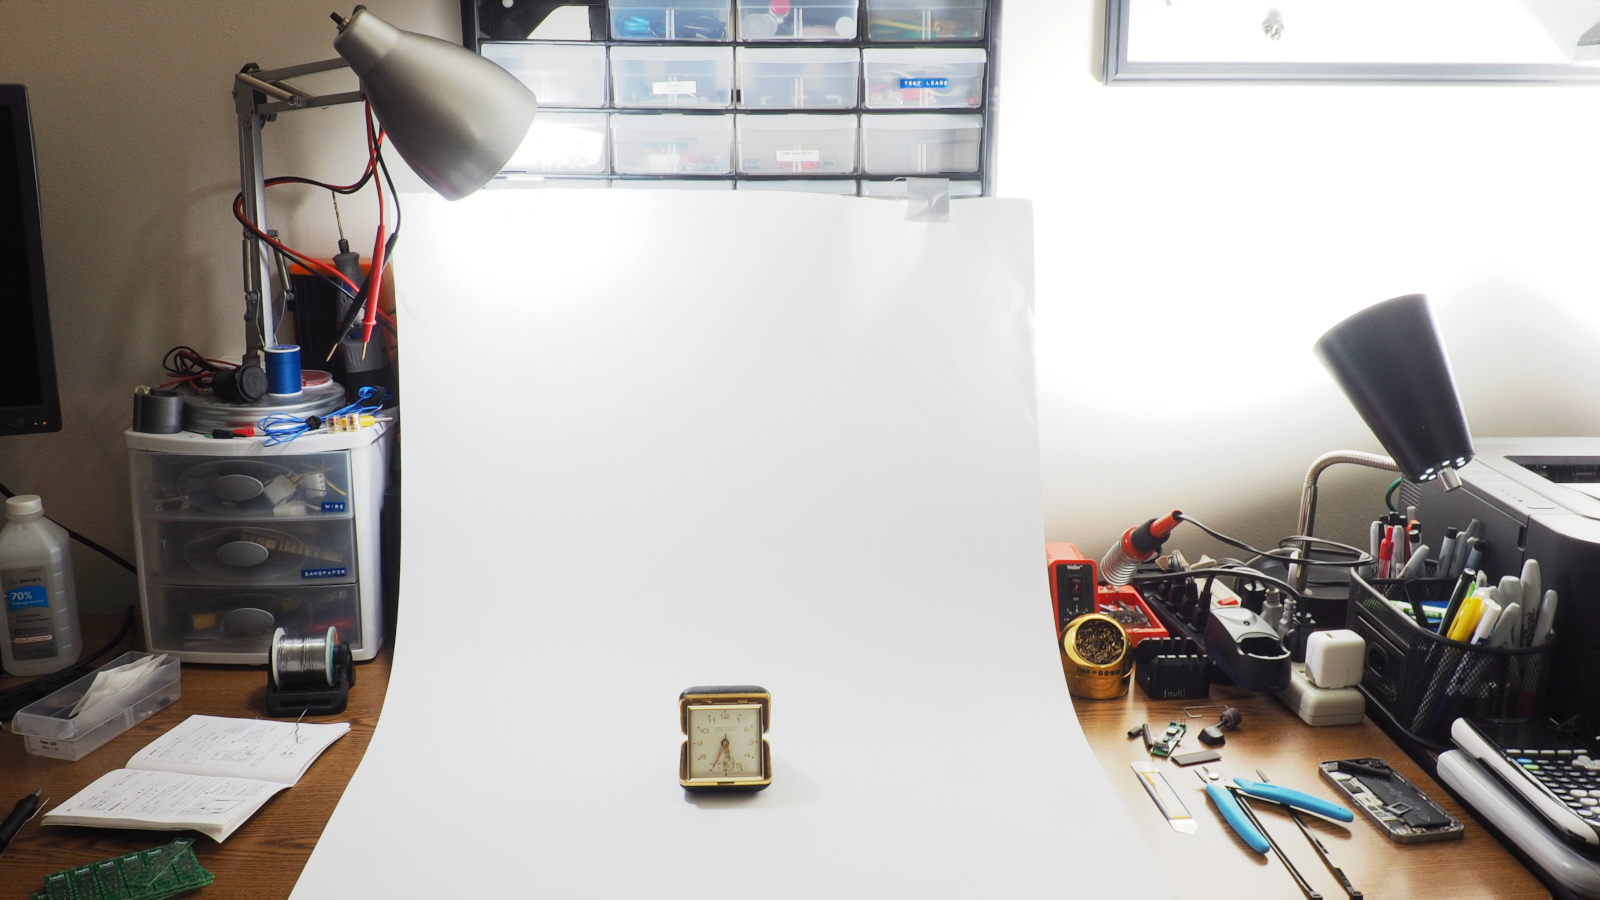
Before we can get started taking photos, we need to find a space to dedicate to taking photos. This does not have to be permanent, but you should pick one place that can be set up and taken down easily for consistency. The space should be somewhere with lots of light, or the ability to add additional lighting, and ample space to lay your items down and clear the surrounding shot of clutter. Preferably a counter top or desk against a wall, the floor works too in a pinch or for large items! In the past I used my bathroom counter top but have since moved to using my electronics workbench as I have adjustable lighting in this area.
Creating a backdrop
Having a good backdrop plays a very important part in taking professional looking product photos. A backdrop can be a multitude of things, this guide will focus specifically on taking photos with a white backdrop. I use a large roll of white paper that I picked up from the local print house. The roll I use is roughly 3 feet in width and can be cut to whatever length I need. I can set it up very quickly, when the paper gets dirty or creased, I can then reuse it as packing material. A good alternative to this would be a dense white sheet or curtain with a fine thread count and no wrinkles. The idea is to get a surface as smooth and uniform as possible to eliminate unwanted shadows. Hang your backdrop up against a wall with a gentile curve as to not create any creases or wrinkles.

Lighting the scene
Lighting is one of the most important aspects to taking good looking photos, if not the most important. You do not need any fancy lights, but they should be bright enough to completely light the scene and eliminate grain in the photo. I use a pair of adjustable task lamps which I can bend to whatever angle I need. It is important not to shine light directly at the object you want to photograph. Doing this will cause ugly hotspots and harsh reflections. What we want to do is light the backdrop so that it is overexposed compared to the subject. This will eliminate many shadows and give the appearance that the subject is floating in a white void. To make this work, it is important that the room has enough ambient light to illuminate the subject. I achieve this by bouncing desk lamps off the wall pointed at the ceiling on the opposite side of the room. Then we light the backdrop from close up, if a white object is placed on the white backdrop, it should appear darker than the overexposed backdrop. This is important so the subject has some contrast against the white backdrop, lighting the subject directly will result in white levels which are too high and make the subject blend into the backdrop.
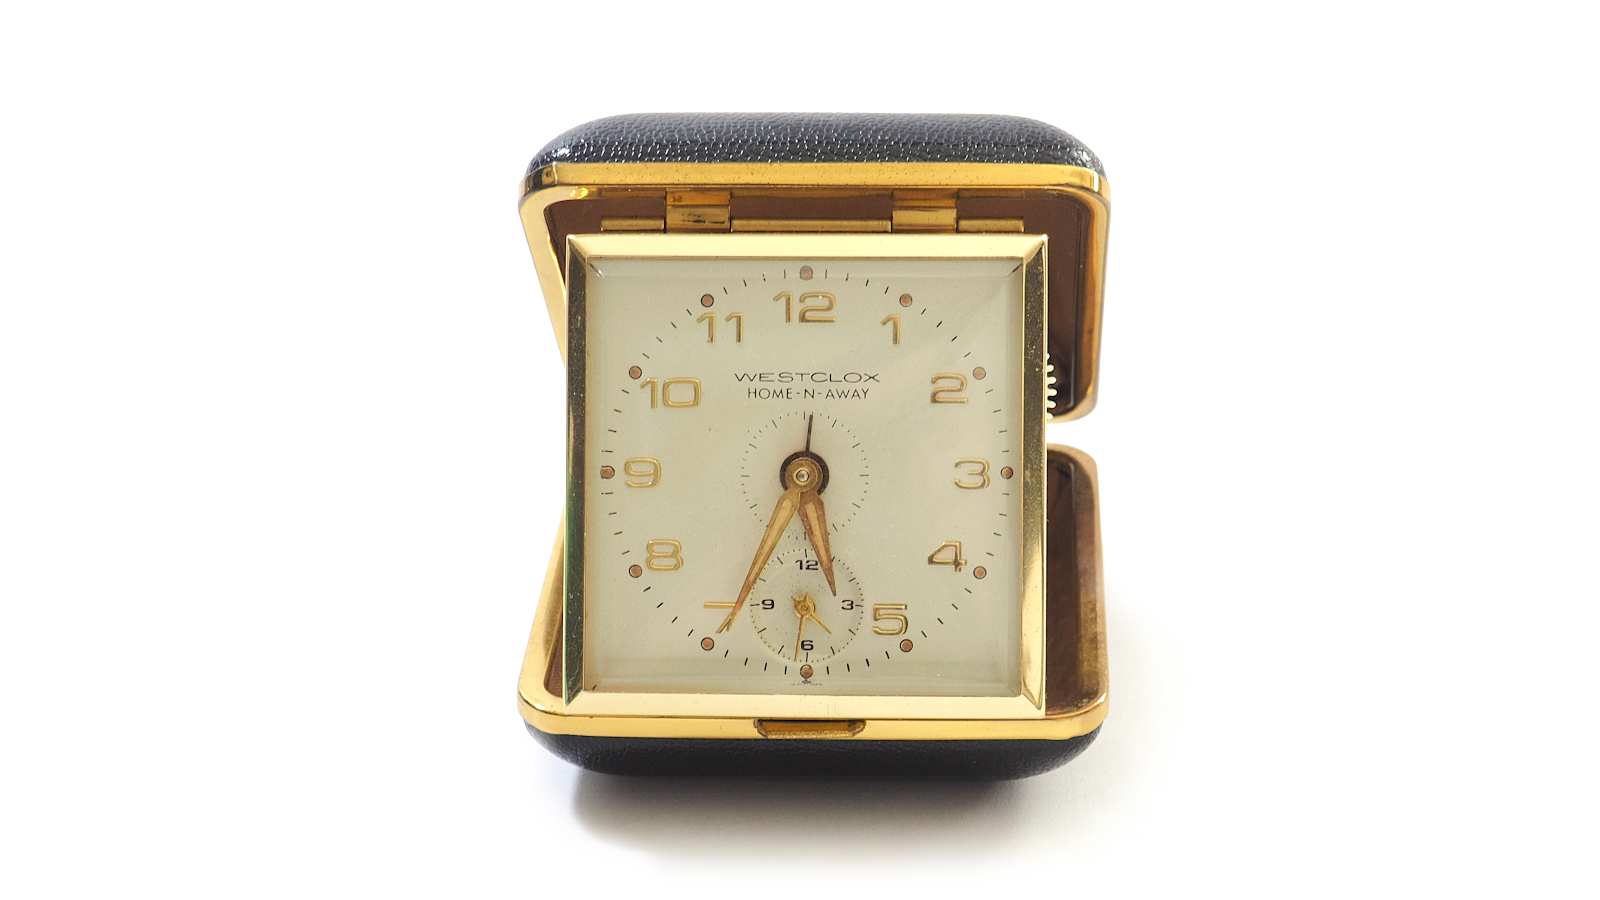
Below is a raw unedited photo taken with an Olympus OM-D E-M10 and a macro lens. You can see that there are no major shadows in the backdrop, even the gradient caused by the paper curving up from the table to the wall is virtually invisible. Note that the white of the clock face is darker than the backdrop, this is exactly what we want. There are some soft shadows cast by the clock itself, this may or may not be desirable for you application. I tend to like short soft shadows as it gives the subject a bit more presence in the scene. Notice that the shadows are cast from behind the object and there are no reflections on the glass clock face. This is because the subject is lit exclusively with ambient light, all point light sources are behind the subject pointing at the backdrop. Do not over-expose the image by increasing the ISO, its okay if the backdrop is slightly off-white at this stage. This will give us more freedom during editing.
Editing
If you have done a really nice job framing and lighting your shot, you may already be happy with the results you have. To get that extra 5% out of our photos we need to edit them to straighten the subject, increase the backdrop white level, and crop the image to frame it nicely. I will be using GIMP for all of the edits because it is a free and open source tool that everyone has access to. The following steps are not meant to be step by step instructions, more an overview of my process for producing clean looking product photos. Keeping things generic makes the guide easier to apply to other image manipulation software.
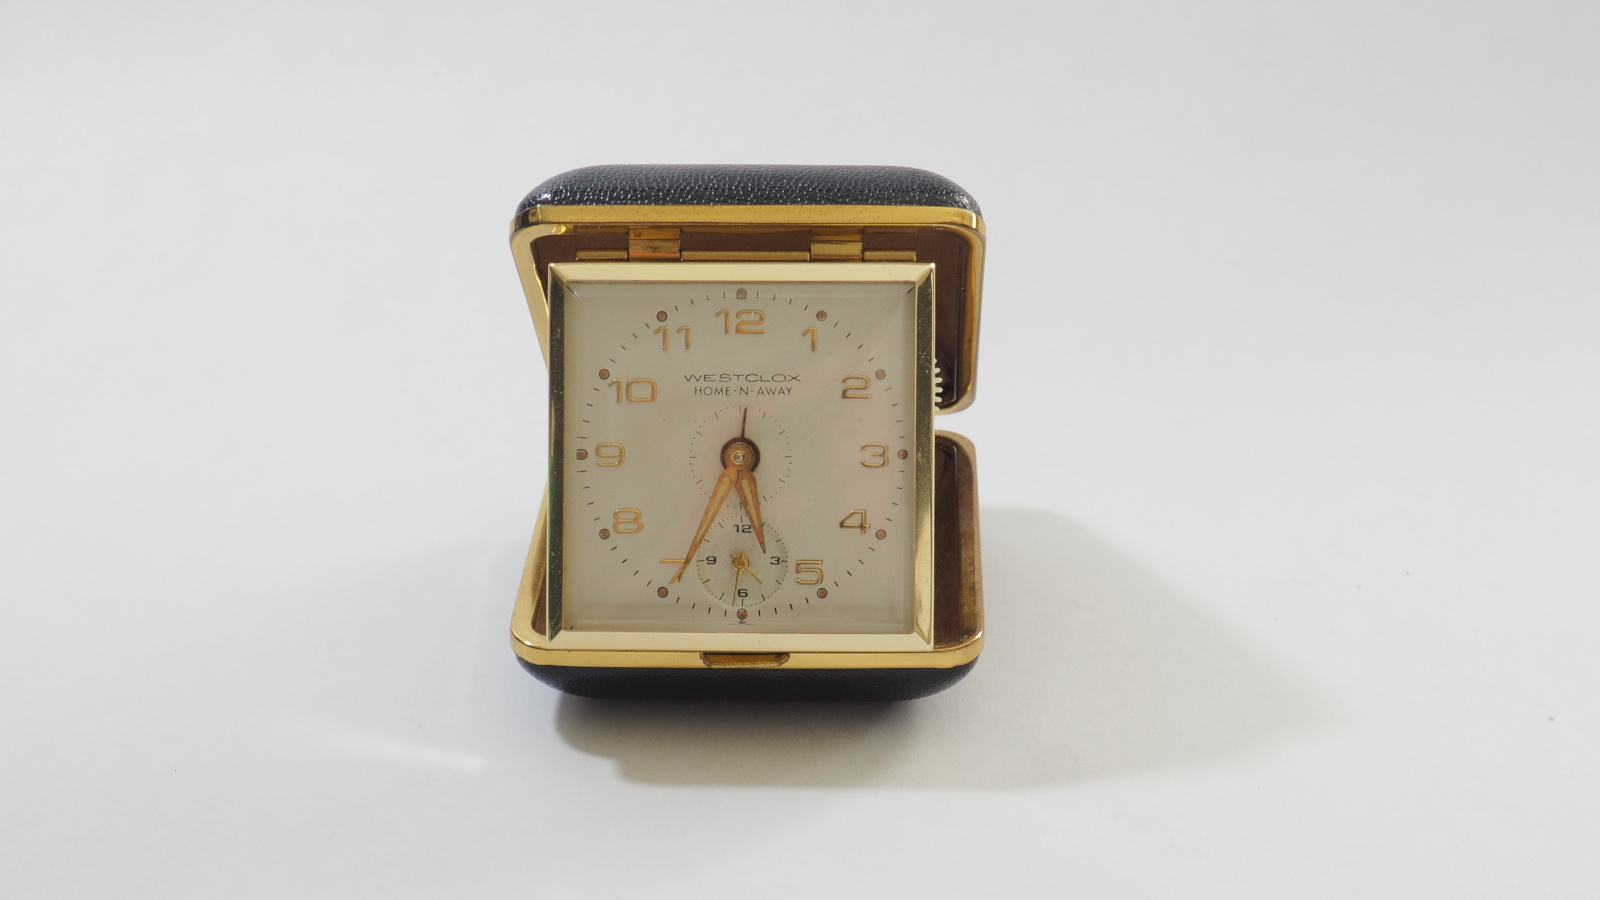
The first thing that I always do is straighten out my shots. With my camera's small viewfinder it is often difficult to get shots perfectly level with my setup. Leaving extra backdrop surrounding your subject in the original shot will help ensure there is enough space left over for making rotation corrections. I start by dragging guides onto the subject at points where a straight line should be. Then rotate the image using the rotate tool until it aligns with the guides. In this case, the subject was already straight within the frame. The perspective tool can also be useful for squaring up a subject that was photographed at an angle. Use it sparingly though, you can really make a photo look strange by trying to overcompensate for skewed perspective.


Now that our subject is square within the frame, we can increase the backdrop exposure to give our shot that nice pristine white background look. This can be done by using the levels or curves tool in most image manipulation suites. Levels is a simpler and quicker method that gets the job done 90% of the time. Simply drag the white level underneath the highlight peak on the graph until all the texture in the background disappears. Curves can be used for finer adjustment, it is especially helpful when the subject is very close in value to the backdrop. Using curves allows us to single out a certain value level to increase contrast at a specific point in the value range instead of linearly. For most scenarios adjusting levels or curves should be enough. You can even run a script or action to process all of your images with the same level settings so you do not have to go through each one and do it over and over. Assuming you have the same lighting across all of your shots of course.


If there is still some undesired shading around the subject, use the lasso select tool and create a rough loop around your subject. Then feather the selection to create a smooth transition between subject and backdrop. Copy the subject, paste it into a new layer, and create a new white layer underneath the subject layer. This should create a nice transition from the subject to a pure white background. This can also be used to help fade out and soften undesired shadows cast by point light sources.


Now all that is left is to center, crop, and resize our image as desired. I like to place guides at the horizontal and vertical center points so that the guides cross in the center of the image. Then I align the center of the subject to that point. This also makes it easy to crop the image. Drag a rectangle of your desired aspect ratio out from the center until the selection frames your subject nicely. For an extra professional look, create a set distance between subject and the edges of your image and use it universally across all of your images. That way all the subjects in your images are the same size and have the same spacing to the edges of the image across your site or store.