ServiceNow: Add Print Article Button to Show Printer Friendly Version of Knowledge Articles
2025.09.28 | Yuki Rea
The ServiceNow Core UI includes a "View Printer Friendly Version" button which is not available by default on the Employee Service Center or Knowledge Portal.
This article explains how to create a custom widget to redirect users to the printer friendly view of the knowledge article from these portals.
Adding this functionality does not require making changes to any existing widgets.
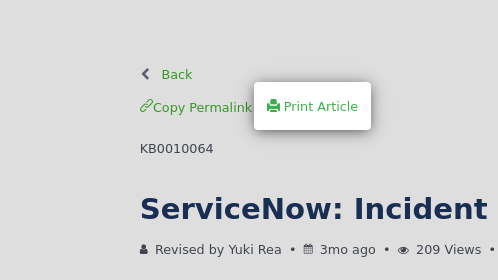
The widget will reference the URL parameters for the number or sys_id of the article and create a clickable link that redirects users to the printer friendly version of this article within the Core UI.
Create a New Widget
Create a new widget by entering sp_widget.do into the filter navigator and pressing Enter.

Name the widget, give it an ID, and ensure the Application scope is set to "Global."
Paste the code listed below into their corresponding fields in the Widget record.
Add custom CSS if needed and modify scripts as desired.
Once complete, Submit the form.

Body HTML Template
<a ng-if="::!c.isMobile"
id="print-article"
class="kb-end-buttons"
href="/kb_view.do?sysparm_article={{::c.data.number}}&sysparm_stack=no&sysparm_force_row_count=25000&sysparm_media=print&sysparm_use_polaris=false">
<span class="glyphicon glyphicon-print"></span> Print Article</a>
Server Script
 1 (function() {
 2     data.number = '';   // Stores the Knowledge Article Number once found
 3
 4     // Function to search the current URI for the parameters within the "candidates" array
 5     function getArticleParam() {
 6         var candidates = [
 7             'sysparm_article',
 8             'sysparm_article_id',
 9             'sys_kb_id',
10             'kb_article',
11             'article_id',
12             'id',
13             'sys_id'
14         ];
15         // Loop through the "candidates" array to check if any of the parameters exist in the URI and returns the value
16         for (var i = 0; i < candidates.length; i++) {
17             var val = $sp.getParameter(candidates[i]);
18             if (val) return val;
19         }
20         return '';
21     }
22
23     // Run the "getArticleParam" function and record it's output to the "idOrNumber" variable
24     var idOrNumber = getArticleParam();
25     // Initiate new GlideRecord within the "kb_knowledge" table
26     var gr = new GlideRecord('kb_knowledge');
27
28     // Locate KB from the "kb_knowledge" table idirectly by "sys_id"
29     // (for KB portal)
30     if (gr.get(idOrNumber)) {
31         data.number = gr.getDisplayValue('number') || '';
32         return;
33     }
34
35     // Locate KB from the "kb_knowledge" table by "number" if "sys_id" was not available
36     // (for ESC portal)
37     gr.initialize();
38     gr.addQuery('number', idOrNumber);
39     gr.query();
40     if (gr.next()) {
41         data.number = gr.getDisplayValue('number') || '';
42         return;
43     }
44
45 })();
Client Controller
1 function KBArticleTitleController($scope, $location, spUtil, cabrillo) {
2     var c = this;
3     c.isMobile = spUtil.isMobile() || cabrillo.isNative();
4 }
Add The Widget to Knowledge View Pages
Once you have finished creating your widget, navigate to the Service Portal Pages list by typing sp_page.list into the filter navigator and then press enter.
Locate the "kb_article_view" (Knowledge Article View) page within the list and open the record.

Once the Knowledge Article View page is open, scroll down and click "Open in Designer" within the "Related Links" section.

Locate your widget within the "Widgets" list and then drag it within the right pane. You can place this anywhere on the page, I chose to place this above the "Knowledge Article Content" widget so that the button is available at the top of the page.

Repeat this step for the "esc_kb_article_view" page to add this widget to the Employee Service Center Knowledge Article View page.